Bringing Makers Together Through Creativity, Sharing & Connection
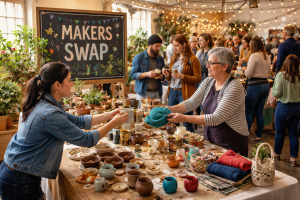
There’s something quietly powerful about gathering people around a shared table – hands busy, ideas flowing, stories exchanged. Whether it’s a craft swap, a skill-sharing session, or a small community workshop, these events create space for creativity, connection, and sustainability to thrive.
In a world that often moves too fast, organising a craft swap or community workshop is an act of slowing down and an invitation for others to do the same.
Why Craft Swaps & Community Workshops Matter
Craft-based gatherings are about more than making things. They help to:
- Build meaningful local connections
- Encourage sustainable, low-waste creative practices
- Share skills across generations and experience levels
- Make creativity accessible and inclusive
- Strengthen community well-being through shared purpose
Whether you’re swapping fabric, teaching a basic printmaking technique, or hosting a relaxed “make & chat” afternoon, these events nurture both people and place.
Here’s a step-by-step guide to help you plan an event that’s welcoming, well-organised, and rich in creative spirit.
Step 1: Define the Purpose of Your Event
Before you book a space or create a poster, get clear on why you’re hosting this gathering.
Ask yourself:
- Is this a craft swap, hands-on workshop, or skill-sharing session?
- Is it beginner-friendly or aimed at experienced makers?
- Is the focus social, educational, or both?
- Will it be free, gold coin donation, or ticketed?
Clarity at this stage will guide every decision that follows.
Step 2: Choose the Right Format
Craft Swap Ideas
- Fabric, yarn, buttons, or notions swap
- Art supplies (paint, brushes, paper)
- Finished handmade items (with guidelines)
- Seasonal swaps (textiles, tools, creative books)
Community Workshop Ideas
- Introductory skills (bookbinding, stitching, lino printing)
- Open-table “bring your own project” sessions
- Demonstration-style workshops with a local maker
- Collaborative community art projects
Keep the format simple – especially for your first event.
Step 3: Find a Welcoming Venue
Look for spaces that feel accessible and community-oriented:
- Local halls or neighbourhood houses
- Libraries or arts centres
- Community workshops or maker spaces
- Studios, sheds, or outdoor spaces (weather permitting)
Make sure to consider:
- Accessibility (mobility, toilets, parking)
- Tables, chairs, and lighting
- Power access (if needed)
- Insurance or public liability requirements
Step 4: Set Clear Guidelines
Clear expectations make people feel comfortable and confident attending.
For a craft swap, outline:
- What items are acceptable
- Clean, usable condition requirements
- Any limits on quantities
- How leftover items will be handled
For workshops, include:
- Skill level
- What’s provided vs what to bring
- Time frame and group size
- Any safety considerations
Simple guidelines = smoother event.
Step 5: Collaborate with Local Makers
Inviting a local artist or crafts-person adds depth and connection to your event.
You might:
- Ask a maker to lead a short workshop
- Invite someone to demonstrate a technique
- Partner with a creative group or association
- Offer a small honorarium or promotion in return
This not only supports local creatives – it enriches the experience for everyone involved.
Step 6: Promote with Heart (Not Hype)
When promoting your event, focus on belonging, not perfection.
Share:
- Why the event matters to you
- Who it’s for (especially beginners welcome!)
- What people can expect to feel, not just do
Use community noticeboards, social media, local newsletters, and word of mouth. Pinterest is especially powerful for craft-focused events.
Step 7: Create a Warm, Inclusive Atmosphere
On the day:
- Greet people as they arrive
- Encourage conversation and sharing
- Allow flexibility and flow
- Let go of perfection
Some of the most meaningful moments happen between stitches, swaps, and shared cups of tea.
Step 8: Reflect & Keep the Connection Going
After your event:
- Share photos (with permission)
- Thank participants and collaborators
- Ask for feedback
- Invite people to future gatherings
Community grows through continuity – one creative moment at a time.
Final Thoughts
Organising a craft swap or community workshop doesn’t require perfection, funding, or formal credentials. It simply requires care, intention, and a willingness to open the door.
When we gather to make, share, and learn together, we’re doing more than crafting – we’re building community.
Caroline
Editor & Maker, Tasmanian Maker’s Journal