Creating your own handmade artist journal is a meaningful way to slow down, reconnect with creativity, and honour traditional craft. Whether you’re an artist, writer, or maker, this step-by-step guide will help you create a beautiful, functional journal using simple tools and materials.
At Tasmanian Maker’s Journal, we believe handmade objects carry stories – and a handmade journal becomes a companion for ideas, sketches, reflections, and moments of everyday creativity.
🌿 A Tasmanian Maker’s Story: Why We Make with Our Hands
In Tasmania, making has always been a quiet language of care. From kitchen tables warmed by morning light, to sheds and studios shaped by salt air and changing seasons, creativity here is woven into everyday life. We mend, stitch, carve, draw, and bind not just to create objects – but to tell stories, to slow time, and to stay connected to place.
A handmade journal carries this spirit beautifully. It reflects the rhythms of the island: folded pages like coastal paths, thread drawn tight with intention, covers that hold marks of use rather than perfection. Each one is shaped by the maker’s hands, choices, and moments – no two ever the same.
For many Tasmanian artists, writers, and craftspeople, an artist journal is where ideas first take root. It’s where charcoal meets paper on a quiet winter afternoon, where words are captured before they drift away, where pressed leaves, tide notes, and workshop sketches sit side by side.
This tutorial is an invitation to step into that tradition.
By making your own handmade artist journal, you’re not just learning a craft – you’re participating in a long lineage of makers who value authenticity, sustainability, and the stories held in handmade things. Whether you fill its pages with sketches, reflections, plans, or moments of wonder, your journal becomes a living record of your creative life.
Let’s begin.
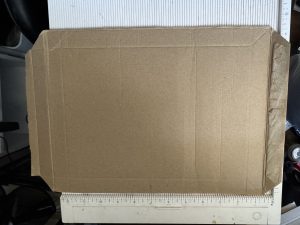
Cut and Score Your Base
Cut a piece of cardboard to the height you want you journal cover to be, plus the width of the front, back, and spine sections. If creating your journal using A4 paper folded in half, your cardboard needs to be about 38-40 cm wide and 21cm high. You can always trim your cover down before adding your signatures,
Using a bone folder or scoring tool, crease the cardboard down both sides of the spine area to make folding clean and easy. This spacing allows your journal to open and close naturally without cracking or weakening over time.
In the example I have made my spine 2.5cm/1in
Cover the Cardboard
Cut a piece of decorative paper or card stock that is roughly 2.5cm taller and wider than your assembled cover size. Glue this to the cardboard – start with the spine section, then add your front and back cover areas. Smooth with a credit card or bone folder to avoid bubbles.
Another option is to cover each side in different papers. In the example I have used a different paper on the front, back and spine but they are all from the same collection so tie in together nicely.
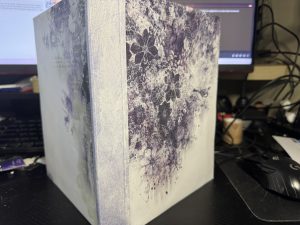
Fold the extra paper edges over to the inside of the cover. Trim and mitre the corners for a crisp finish.
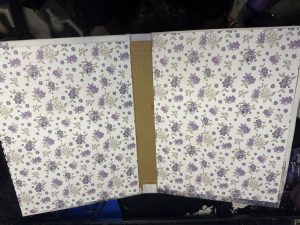
Cut another piece of paper to cover the inside that is the same size as your cardboard.
Glue this to your cardboard.
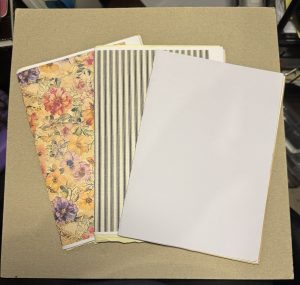
Make your Signatures
While waiting for your cover to dry, we can create our journal signatures – the pages that go into your cover.
Collect a pile of papers – I find 6-8 pages work well per signature, you can go more if you want but keep the width of your journal spine in mind.
Fold your papers in half.
Layer different types of papers together.
Fold your signature cover paper to cover your stack of papers & trim to fit, if required.
Repeat for the number of signatures you wish to have in your journal.
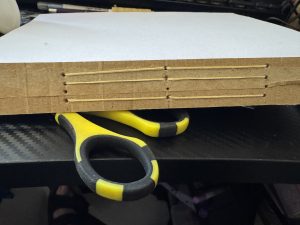
Punch Holes for Binding
To sew your journal signatures into the cover, you need a hole template: measure the spine height, cut a paper strip to match, and mark where your holes will go (usually evenly spaced about ¼” apart). Use binder clips to hold the template in place and punch holes with an awl.
Mark and punch matching holes in your signatures so they align perfectly.
A temple is provided for an A5 (half A4) signature as well as a template to punch holes into your journal spine (or hidden spine)
Bind Your Journal (skip this step if you want hidden binding)
Thread a strong needle with embroidery or bookbinding thread and sew your signatures into the cover, starting from the centre to the inside and back out again (see below diagram)
How to saddle stitch your binding
Starting from the centre hole, push the needle through, leaving a small tail on the inside.
Then, work your way out toward one end, stitching through each hole.
Once you reach the end, come back toward the centre and then stitch toward the opposite end.
Finish by return through the centre and create a double knot with your two tails.
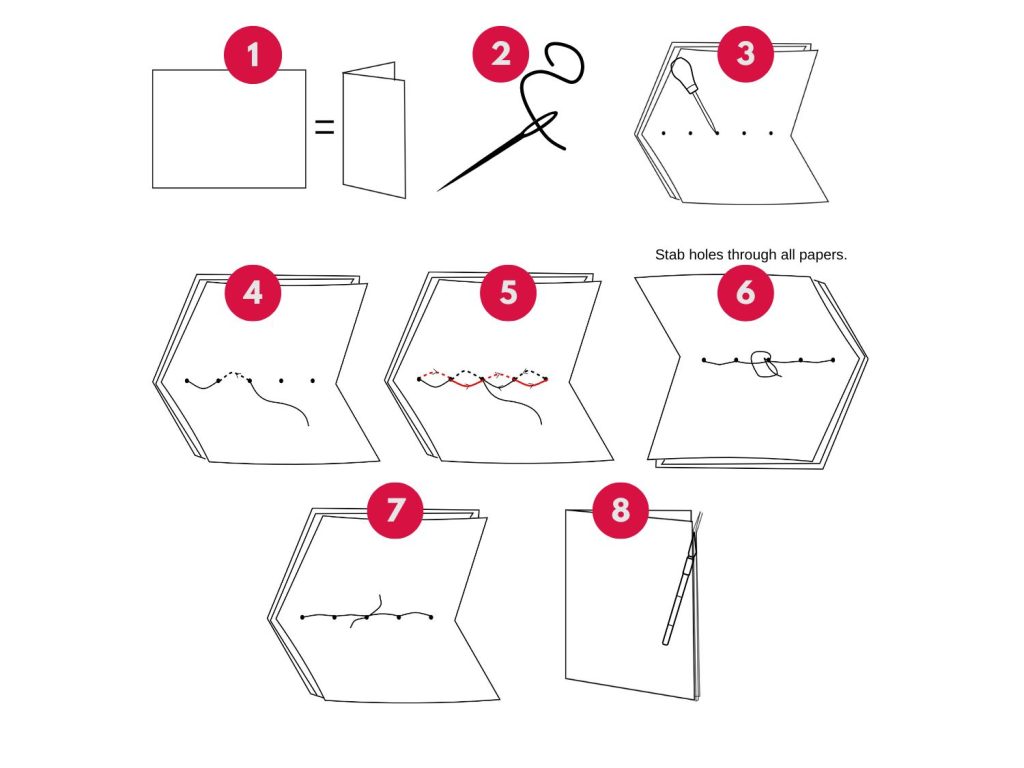
Creating hidden binding
Cut an extra piece of cardboard, 1.5cm smaller than your cover spine. Cover one side with your pattern paper of choice. Use your hole template to punch holes in your spine then sew in your journal signatures as above. Once you have finished, use a strong adhesive to glue your binding to the spine.
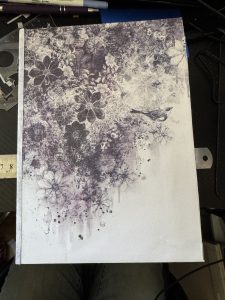
Finishing Touches
Now that your cover is assembled and your pages are bound in, take a moment to decorate — adding pockets, tags, and embellishments on the inside covers can elevate your journal and make it personal.
You might also add closures like ribbons, leather straps, or elastic bands to keep your journal snug when closed.
Downloads: Tutorial | Spine Hole Template (Coming soon)
🌿 How to Use Your Handmade Journal
- Sketchbook for art & design
- Nature journal
- Creative writing or poetry
- Gratitude or slow-living journal
- Travel or maker process diary
Over time, it becomes a story in itself.
🌱 A Final Thought
A handmade journal doesn’t ask to be perfect or productive. It asks only to be used, returned to, and lived with. Let this be a space where creativity unfolds at its own pace – shaped by your hands, your stories, and the quiet moments in between.
🌿 Maker Reflection
Before you move on to the next step, pause for a moment with what you’ve just made. Notice the feel of the paper, the tension of the thread, the small imperfections that mark this journal as uniquely yours. Handmade objects hold the energy of the time spent with them — this one already carries the story of its making.
- How did working slowly and with your hands affect your mindset?
- What does this journal invite you to record, explore, or return to?
- How does making your own creative tools change the way you value and care for them?
There’s no right answer — only your experience. Let this journal become a quiet witness to your creative life as it unfolds.
Caroline
Editor & Maker, Tasmanian Maker’s Journal